
At Heiland Home Services, we prioritize educating and informing our clients and community about their home’s plumbing! That’s why we regularly update our blog with helpful tips and tricks to make YOU a more informed homeowner. When you inevitably do run into a plumbing project that’s above your paygrade… you know who has your best interest in mind!
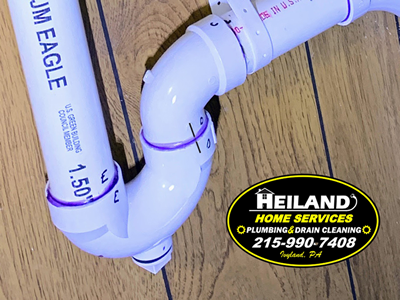
Tips and tricks are great, but ultimately, they mean nothing if you don’t have the basics down! What you might need is a little “Plumbing 101.” Before you dive into your next project, make sure you’ve brushed up on the proper steps and procedures for quality leak-proof PVC connections.
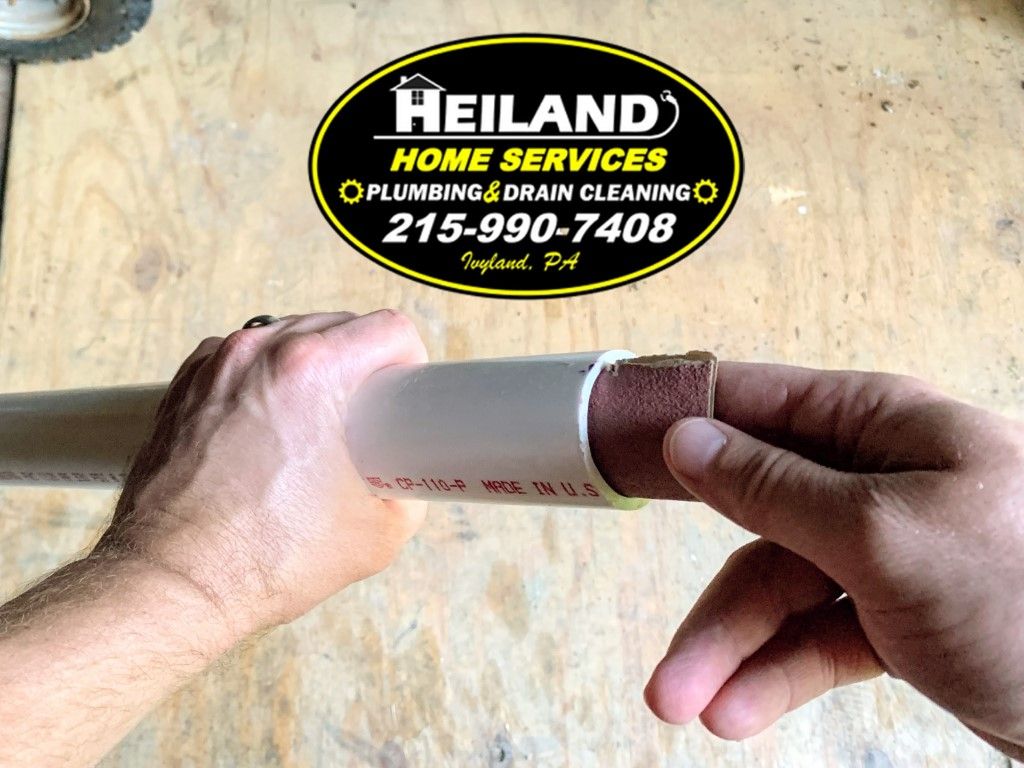

1) Start with clean square cuts.
Square pipe ends make for a more snug fit, allow plenty of contact area for the solvent cement to bond, and also improve overall water flow with a clean smooth surface on the inside of the pipe. Specialized rotating or ratcheting pipe cutters are available at your local plumbing retailer or hardware store, but a simple hand saw will do the job in a pinch. If you are working on a project that requires a lot of cuts, a miter saw is the way to go! Whatever method you choose, make sure you debur the loose snowflake-looking plastic material left behind so you have a smooth mating service for your bond. If ignored, burrs can snag hair or other debris passing through your pipes and result in unwanted clogs. A utility knife will do the trick, or remove burrs with a sheet of 80-grit sandpaper to flatten out the marred edge and make sure your pipes are imperfection free and ready to join. Clean the pipes with a chemical cleaner and/or sandpaper and you’re ready to go.
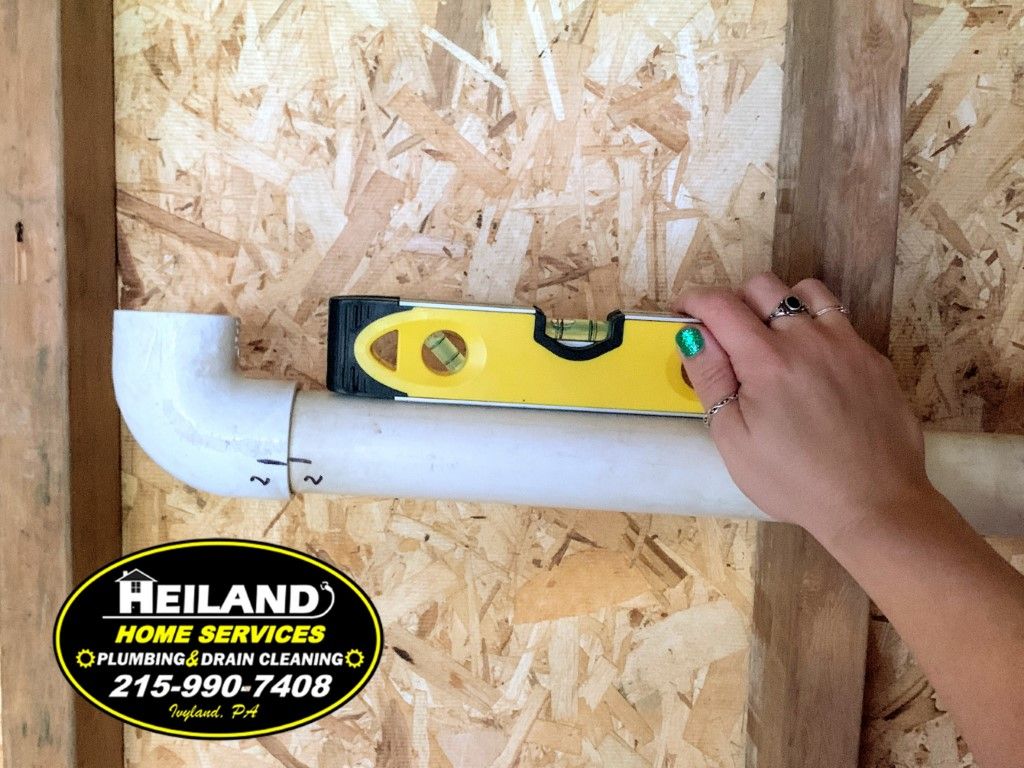
2) Always dry fit your pipes and connections!
When it comes time to apply cement, you’ll only have a few seconds to achieve proper alignment before the pieces are bonded together, that’s why it is absolutely essential to make sure everything will line up correctly and have the proper slope BEFORE you start attaching pipes and fittings. Even if you are confident it is a simple job, do yourself a favor and dry-fit so you’re not wasting valuable time heading back to the store for additional pipe and fittings when things don’t line up properly!
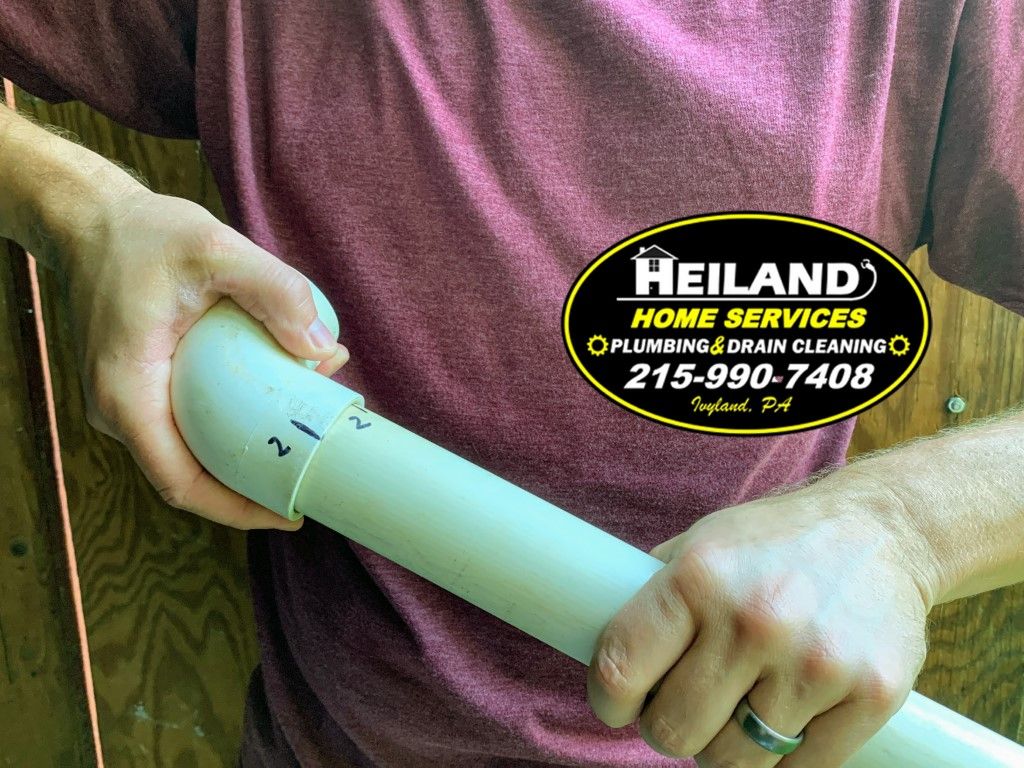
3) Mark your pipes and fittings for quick and accurate assembly.
For this next step, grab a sharpie marker and get ready to make some notations. With your pipes dry-fitted, mark each pipe or connection with a number or letter to help you remember what connections go where. (ie: If a straight pipe and an elbow are to be connected, mark a 1 on each piece at the connection point.) If orientation is critical at a joint, make an alignment mark on each piece where they need to line up so you know without a doubt that everything will end up where you need it to be. While this step may seem tedious and unnecessary, you’ll soon be disassembling the test fit, and reassembly will be much easier if you’re not doing it from memory. If helpful, you can also take a photograph of your dry-fit for reference when you’re completing your final build.
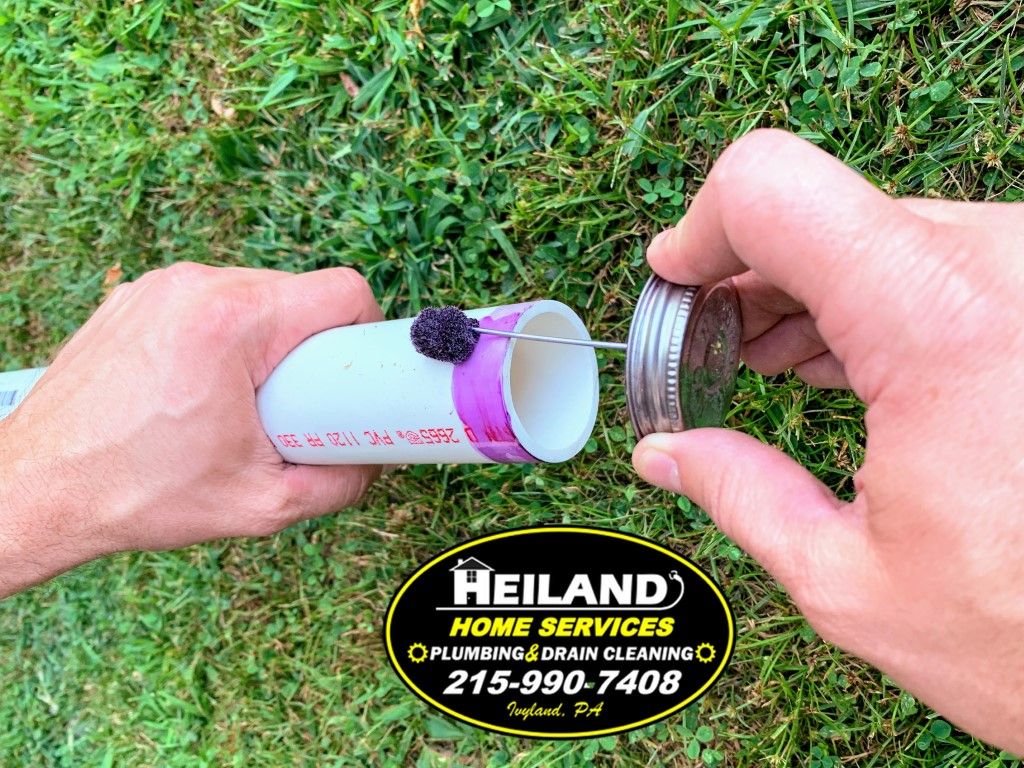
4) Apply Primer and Cement
While we often call joining PVC “gluing,” it’s really not glue at all! More accurately, what you will be doing is solvent welding. Similar to welding metal, after the solvent “melts” or “liquefies” the surface of the pipe or fitting, the two pieces are essentially bonded together. You’ve really only got one shot! Wipe the inside of the fitting and the outside of the pipe you will be joining with PVC primer, letting it dry for about 10 seconds. While the primer is still wet, spread an even layer of solvent PVC cement on both portions of the pipe. Make sure you have an even layer of cement on all mating surfaces, and be careful not to apply an excess of cement to the inside of the socket or you’ll end up pushing extra solvent into the pipe. (Disclaimer: Some PVC glues have primer included and some require no primer at all. Make sure to follow all manufacturer’s safety precautions and procedures to ensure your own safety and a leak-free bond. Also take into consideration local regulations and jurisdiction. If an inspector deems that plumbing is not installed to code, you may have an expensive re-pipe on your hands!)
5) A Quarter turn, nice and firm!
After the cement has been applied, you’ll have to work quickly, connecting the pipe and fitting before the cement dries and you are out of time. This is where you’ll be thankful you marked your pipes in an earlier step! Insert the pipe about a quarter turn from its final resting place (where you’ve made your alignment mark) and push the pipe into the fitting as you twist it until the alignment marks line up and it is fully seated in the socket. Twisting the fitting into position assures an even spread of cement and a solid, leak-free joint. Firmly hold the new connection together for 30 seconds, allowing the two pieces to “melt” together to the point where they can be left to fully cure. Failing to apply pressure can result in the pipe pushing out of the fitting, which can cause a weak joint or allow space for buildup on the inside of the pipe.
6) Check your work and wait for cure.
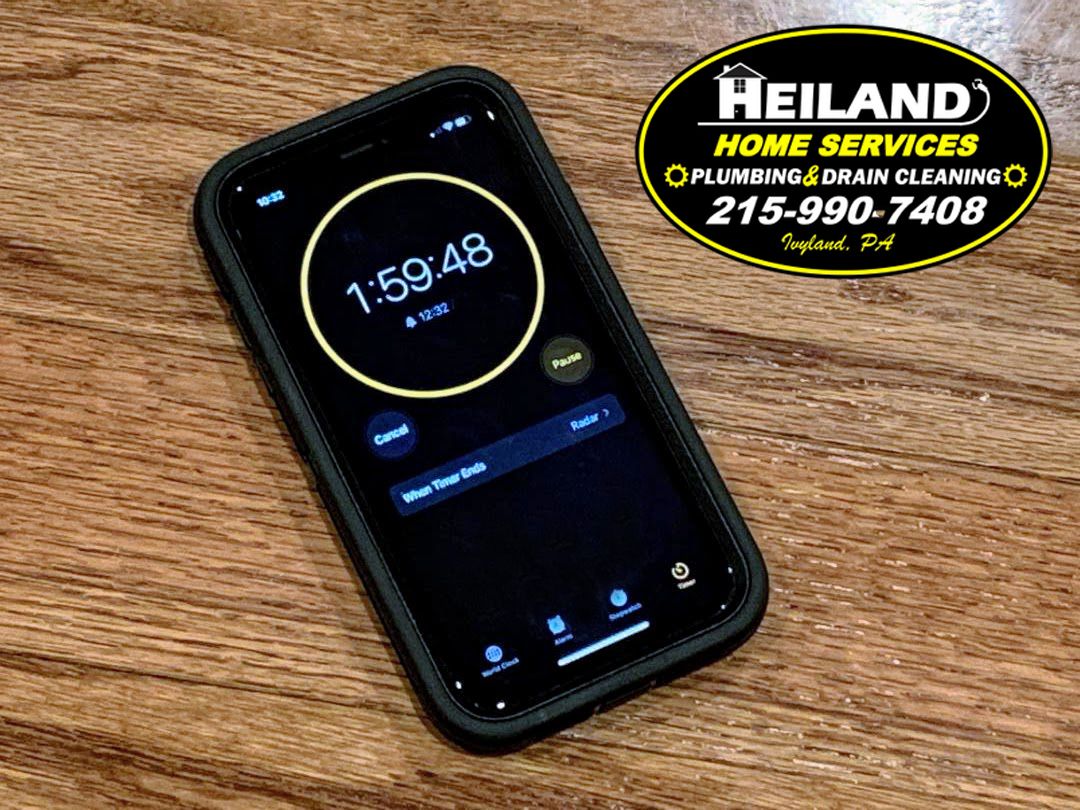
As with any home repair: check your work, check your work, check your work! Visually inspect all of your joints and fittings to assure they have fully seated and break out the level to make sure you have adequate slope. Don’t be afraid to cut out a bad section and start over. Mistakes happen, but you can save yourself a lot of time, money, and headache if you catch those mistakes now! While you’ll be tempted to immediately turn on the water or test your appliance (everything seems firm, right?!) don’t do it! Consult the cement manufacturer’s instructions for their recommended cure times. Most will require at least two hours before the connection can be put into operation.
Maybe you’ve found that the project you embarked on is more advanced than “Plumbing 101” can guide you through? There’s no shame in that! If that’s the case, give us a call to schedule an appointment. At Heiland, we place just as much importance on customer service as we do on our high standards of technical excellence, and it shows. We don’t want you to just be a customer—we want you to feel like family. Give us a call today!
